


Turning Boxes
A lidded box is a very simple woodturning project: The design possibilities are endless and the finished results make great gifts.
Author: Alan Holtham
Rating: ")
Difficulty: 

.png) |
|
Woodturning Project: Turning Boxes by Alan Holtham |
|
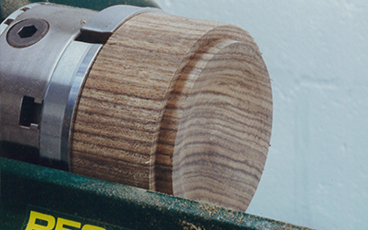
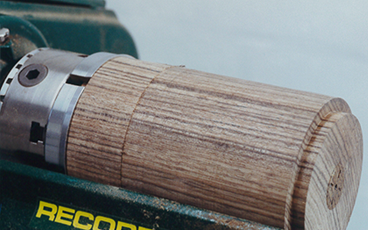
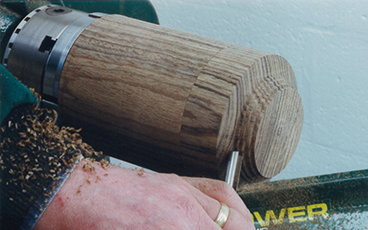
A lidded box is a very simple woodturning project, Picture 1, the design possibilities are endless and the finished results make super little gifts. You can use up all sorts of scraps of timber, just make the box to suit what’s available. Whatever the design, the principles for making it are the same, you don’t need a vast collection of tools, but a good scroll chuck will help enormously. For this box I am using a 4 x 4” block of Ovankol 8” long, so start by finding the centres using a ruler across the diagonals, Picture 2. Mount it in the lathe between centres, a revolving centre is a necessity in the tailstock end, and then start to rough it down to a cylinder using a 3/4” roughing gouge, Picture 3. Work your way along the blank, gradually moving towards the headstock end, Picture 4. Always work off the end this way in a series of passes, rather than onto the work, or there is a real danger of splitting off a long length of the corner which may then fly up at you. Once you have roughed down just over half way, turn the gouge round and start working off the other end, Picture 5, to complete the cylinder. Then use a parting tool to form a spigot on one end of the blank, Picture 6. Make this a suitable size to fit in the gripping collet of your scroll chuck. The secret of getting a good grip on this spigot is to make sure that it is really parallel and that the shoulders are slightly undercut, Picture 6. |
.png) |
.png) |
| Picture 1. | Picture 2. | |
.png) |
.png) |
|
| Picture 3. | Picture 4. | |
.png) |
.png) |
|
| Picture 5. | Picture 6. |
|
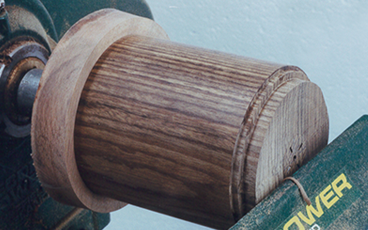
This is important if the blank is to sit squarely in the chuck without any ‘rocking’. Repeat the process for the other end, Picture 7, as this will become the lid and you will need to hold it for shaping the inside. You can now transfer the blank to your scroll chuck. This is an essential aid for all your woodturning, it makes the work much easier, so do consider buying one if you haven’t yet taken the plunge! I used the largest jaws on my RP4000 chuck, Picture 8, gripping the spigot on the end of the blank, Picture 9. Providing that the spigot has been turned accurately as described above this should give sufficient grip to hold even a large blank like this. The next step is to part off the lid section using a narrow parting tool to minimise the grain disruption when you come to refit the lid, Picture 10. Always waggle the parting tool slightly as it goes in to create some side clearance, Picture 11. If you don’t, the tool will bind as the cut goes in deep and will also overheat, so do be careful in this situation. With the lid out of the way start hollowing out the main part of the box. You can do all this with turning tools if you want, but it is much quicker to drill out the waste using a chuck in the tailstock, Picture 12. |
|
| Picture 7. | |
 |
|
| Picture 8. | |
.png) |
.png) |
| Picture 9. | Picture 10. |
.png) |
.png) |
| Picture 11. | Picture 12. |
.png)
|
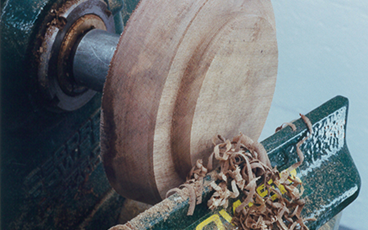
I use saw Forstner bits, starting with a 3/4” one, then opening it out with a 1 1/2”, Picture 13. Doing it in two stages like this makes it much easier on hard end grain and reduces the strain on the chuck jaws. With the bulk of the waste out of the way, use a side-cutting scraper to remove the rest of it, Picture 14. Be careful to keep the scraper pointing well down and pull it out sideways rather than just pushing it in. Be aware of the amount of tool overhang as you reach into the bottom of the box, Picture 15, a shaped rest that goes inside the box would be ideal to increase support if one is available. Otherwise just work carefully, turning the scraper slightly on its side to produce a shear cut rather than a full flat cut. The other problem with turning deep boxes is that the swarf accumulates around the side of the box with the centrifugal force, Picture 16, and blocks your view of the tool. Stop the lathe occasionally to clear it out of the way and restore your view of what is going on! To finish off the inside use a round nosed scraper, again slightly on its side and blend the sides into the bottom, Picture 17. Once the shaping is finished, sand and seal the inside but don’t bother polishing it yet, Picture 18. |
|
| Picture 13. | |
.png) |
|
| Picture 14. | |
.png) |
.png) |
| Picture 15. | Picture 16. |
.png) |
.png) |
| Picture 17. | Picture 18. |
.png)
|
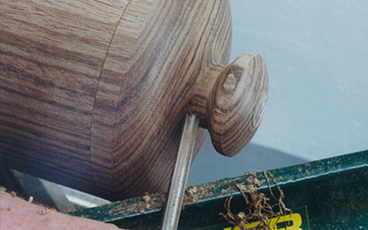
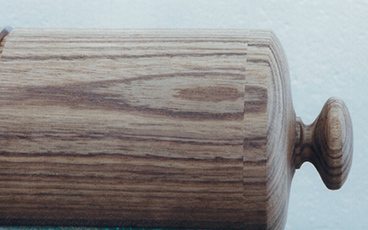
Now grip the spigot of the lid blank in the chuck in the same way as the base, Picture 19, and turn the underside of the lid. form another short spigot that is a really tight fit in the base section, Picture 20, you are going to use the base as a jam chuck so it must be really secure, Picture 21. Do take care though not to make it so tight that you split the base! Polish the inside of this lid as it will be your last chance to access it. Now re-grip the whole assembly and turn the outer lid profile using a small spindle gouge, Picture 22. The knob is formed as an integral part of the lid, Picture 23, but you can vary the design to suit the wood available. If you are short of timber add a knob in a contrasting timber. Finally, clean up the outer diameter of the two sections together, Picture 24, there is usually a small amount of error from the re-chucking. |
|
| Picture 19. | |
 |
|
| Picture 20. | |
 |
 |
| Picture 21. | Picture 22. |
 |
 |
| Picture 23. | Picture 24. |
.png)
|
With the outside finished you can now sand and polish it with whatever finish you like. I used friction polish over a cellulose sanding sealer and then buffed with a soft paste wax. The next bit is often tricky, but you must separate the lid from the base. If necessary use a very fine knife in the join, carefully prising it apart. Once the lid is free, sand the inside of the base to loosen the fit, Picture 25, then polish the inside to match the rest. You can just part the base off at this stage but I prefer to have the base properly finished, so you need to hold it in some way to do this. The safest way is to turn a piece of scrap to be a tight fit in the box, Picture 26, then bang it onto this to allow you to clean off the gripping spigot, Picture 27, and polish the underneath. |
|
| Picture 25. | |
 |
 |
| Picture 26. | Picture 27. |
.png)


