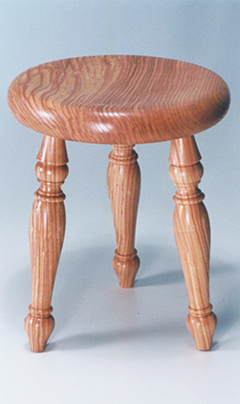
Three Legged Stool
Alan Holtham gives a clear step-by-step guide to making the classic three legged stool.
")


.png) |
Woodturning Projects: Three Legged Stool
|
|
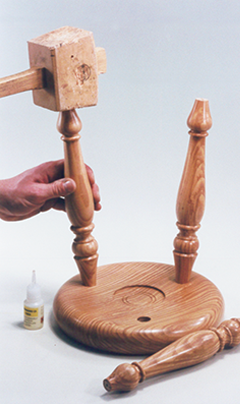
Most of my woodturning projects are born out of some form of necessity, the aim being to produce a practical object with a distinctly useful function. This one however was born out of sheer exasperation, but nevertheless resulted in a very functional little piece of furniture. My youngest daughter is just at that very awkward age when it comes to putting on her own shoes. She cannot quite do them on her own but is now too big to lift up onto the worktop where I usually hold her captive. Standing still for more than two seconds also seems out of the question, and we always end up with a major conflict whenever we have to go out and the ‘s’ word is mentioned. After a particularly harrowing experience recently, I foolishly declared that I was going to make a ‘magic stool’ that wouldn’t let her go until her shoes were on properly and on the right feet. As a father of three I should know by now that any promises made to children are sacrosanct, and repetitive daily enquiries about the whereabouts of the magic stool eventually goaded me into actually making one. |
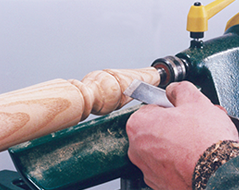
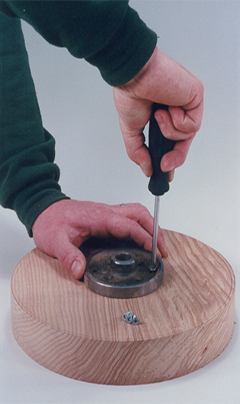
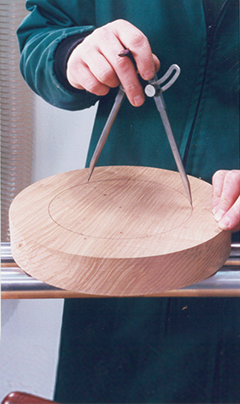
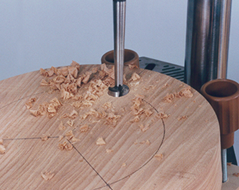
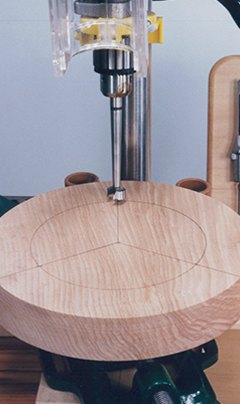
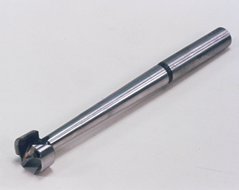
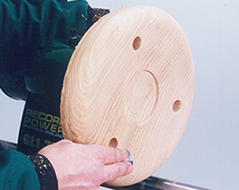
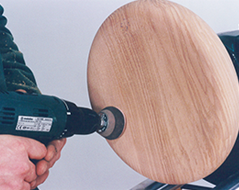
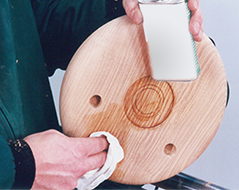
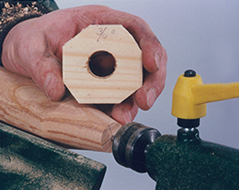
I took all the material out of one short board of 2” ash, cutting the biggest diameter I could get for the seat, a bare 11”, and then three legs at 12 ½” long, picture 1. I started with this seat blank, getting an initial fixing with a faceplate screwed on to what is to be the top surface, picture 2. Take care here though, because if you use long screws you will leave screwholes that can’t be turned away when you eventually come to shape the top. I used ¾” screws in a 4” faceplate, so the overall projection into the wood was only ½”. |
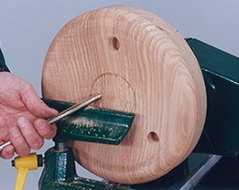
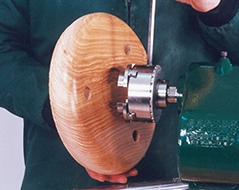
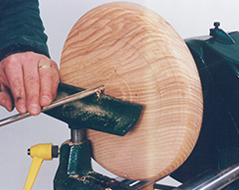
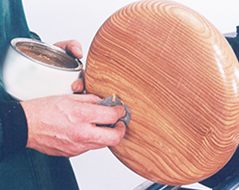
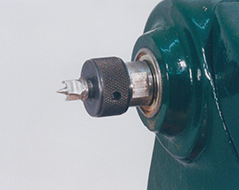
If you use twinstart screws you can screw them straight in, there is no need to drill a pilot hole, and therefore no risk of drilling too deep. Mount the blank on the lathe and do check these large diameters carefully for clearance before you start up. I set the lowest speed to start with just in case. On my Record Number 1 this is 450 rpm, and I then used a 3/8” bowl gouge to trim the outer diameter, picture 3, then swung the rest round and true up the face. |
.png) |
|
|
| Picture 1. | ||
.png) |
||
| Picture 3. | Picture 2. | |
|
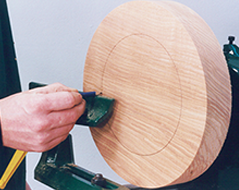
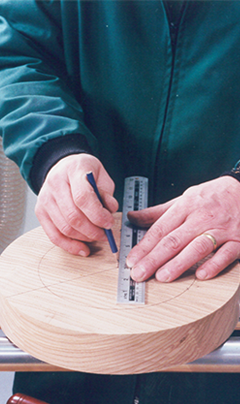
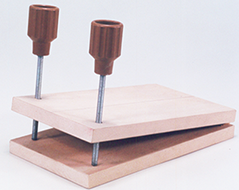
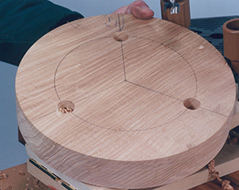
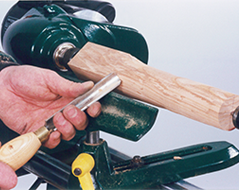
Now scribe a line with a pencil 2” in from the edge, picture 4, take the blank off the lathe and mark a point anywhere on this circle. Then by trial and error use a pair of dividers to keep stepping round the circle, starting at the mark, making two other marks and then finishing up exactly back on the first mark, picture 5. You will have to do it several times until the dividers are set just right. This accurately divides out the drilling points for the legs, I am sure someone will write in with a much more scientific method than this, but it works well for me, so don’t knock it. Next draw a line from the exact centre of the blank out to the rim, through each of these drilling points, picture 6, this will help with alignment later. The next major consideration is the angle of splay of the legs. For once I actually made a full size sketch of the stool before I started, putting the legs in at the appropriate angle by eye, picture 7. There are several alternative methods of drilling for the legs. The ‘seat of your pants’ approach is to do the whole thing freehand using the Mark 1 eyeball, but in my experience this more often than not leads to a very lopsided effect. You can do it on the lathe, but this also has potential pitfalls, so the most elegant solution has to be the drill press. Some sort of jig is needed, and using the maxim that the simplest is the best, I made the one shown, picture 8, from a bit of mdf, a couple of hinges, two knobs and a length of threaded rod. The two bits of mdf are hinged at the back, adjustment of the angle being provided with the two knobs, the rod passing through captive nuts set into the underside of the top piece. It took about 20 minutes to make but has saved hours and hours of fiddling about trying to pack pieces to make up the correct angle. Make one, you’ll use it a lot! |
 |
 |
| Picture 4. | ||
 |
||
| Picture 5. | ||
 |
||
| Picture 6. | Picture 7. | |
 |
||
| Picture 8. | ||
|
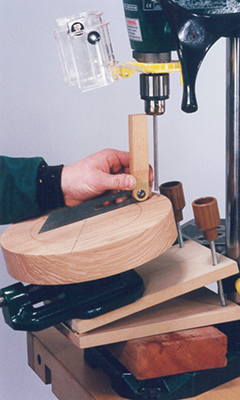
My drill press is relatively small, and there was not enough height to fit everything on the table and get the bit in as well. So I swung the table out of the way and used the base, but this now required a 2” offcut to bring the height back, it looks more precarious than it really was, picture 9. Notice that I am holding the blank by gripping the faceplate in the drill vice, and this just sits on the angle jig. I transferred the leg splay angle from the drawing using a sliding bevel, and with the aid of a bit of straight rod in the drill chuck adjusted the jig angle until it was the same. Then replace the rod with a drill bit of some sort, I used a forstner pattern, picture 10. These are better than a sawtooth for this type of job as they give a cleaner entry when you are drilling at an angle, but a sawtooth will do if you don’t have a forstner. Before you actually do the boring, arrange the blank so that the pencil line from the centre to the drilling position is perfectly true with the bit, picture 11. This ensures that the legs all splay out equally. My bit was ¾” diameter so I ran it at 700 rpm, withdrawing it regularly to keep it cutting freely, picture 12. Forstners soon burn around the rim if you force and then clog them, and they are expensive, so take your time. Also make sure that you hold the blank securely to stop it ‘creeping’ on the jig, the holes must be really accurate. Repeat the process for all three holes, picture 13, using the depth stop on the drill to get them all the same depth. |
 |
|
| Picture 10. | ||
 |
||
| Picture 9. | Picture 12. | |
 |
 |
|
| Picture 13. | ||
 |
||
| Picture 11. | Picture 14. | |
|
Sand and polish this to the finish of your choice, but you will have to just be a little bit careful here. The spinning holes have the potential danger for snagging either your fingers, the abrasive or the cloth, picture 15. The remedy is to sand with your hand very flat to the surface as shown, so that the paper trails, rather than using a very square on approach. This way the danger is minimised, and it just feels a little uncomfortable. I wanted a satin finish that was hard wearing and quick to apply, so settled on three coats of cellulose sanding sealer rubbed in with a cloth, picture 16, flatted down between coats and then topped off with a coat of pastewax. |
 |
|
| Picture 15. | Picture 16. | |
 |
 |
|
| Picture 17. | Picture 18. | |
 |
 |
|
| Picture 19. | Picture 20. | |
 |
 |
|
| Picture 21. | Picture 22. | |
|
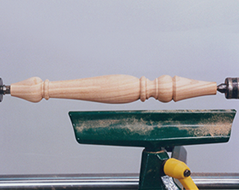
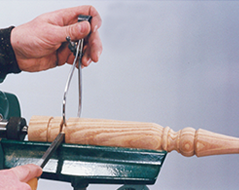
I began the shaping at the tailstock end, forming the dowel that was to fit into the seat top. There is a really good tip here for getting this just right. Callipers are OK but can vary a little, so while you are drilling the seat holes, just bore a hole in a piece of thin scrapwood with the same drill, picture 23. Mark this clearly with the diameter for future use, and then slip it over the tailstock centre before remounting the work. Now all you have to do is stop the lathe occasionally and just try and slide it onto the tenon. After a few tries you should have the perfect fit, and you can get it just as tight as you want it. The template may spin with the wood a bit but I just roughly cut the corners off so it is quite safe. Try it sometime it really does work well. Cut the detail cleanly to leave sharp corners, picture 24, it makes the job look so much more professional, and as usual I always incise in with the skew at each change of detail to make the whole profile look crisp, picture 25. |
 |
|
| Picture 23. | Picture 24. | |
 |
 |
|
| Picture 25. | Picture 26. | |
.png) |
Picture 28. |
|
| Picture 27. | ||
 |
||
| Picture 29. |