


Successful Friction Polishing
Alan Holtham give an in-depth guide to achieving a superior finish with friction polish.
")
.png) |
|
Successful Friction Polishing |
|
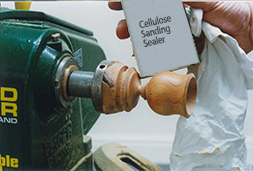
One problem I seem to get more queries on than any other is finishing the work, and in particular getting a high gloss polish. Many beginners assume that there is some mysterious art to a gloss finish, akin to the mystique surrounding French polishing. In fact it is quite a simple process providing you work within the limitations of the material and follow a few basic procedures. You will need some friction polish, sanding sealer and a range of abrasives and lots of patience. |
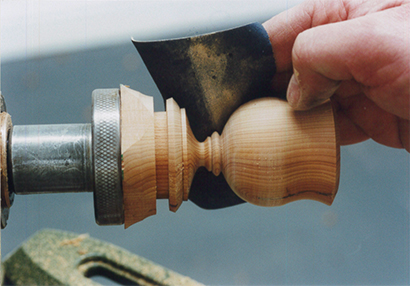
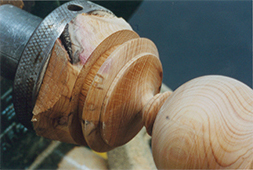
tight creases without the abrasive cracking off the backing, and they allow you to get into the fine detail without rounding it over. Mark the grade on the back in some way so you don’t use them out of order, Picture 2. There is no specific grade at which you should begin, it all depends on how good the surface is to start with. As a guide, I would normally start on a piece of spindle turning with something like 240g, but I might need 180g if the surface is very open, or maybe down to 80g on a piece of spalted wood. You have to assess the starting point for yourself, but always try and start as fine as possible or you will put in scratches that are very difficult to remove later. Then work progressively down the grades, I would suggest 180, 240,320, 400 grit is a good progression. If you work down in bigger steps than this you will leave sanding rings. Take your time with this sanding making sure that all areas are covered, but take care not to spoil the sharp detail by oversanding. This is so important to maintain the crispness that immediately distinguishes the beginner from the pro. Use the paper folded tight for this, Picture 3, working into specific areas rather than just applying it in a broad sweep, Picture 4. |
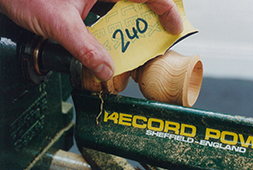 |
| Picture 1. | ||
 |
||
|
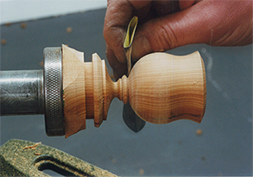
Picture 2. |
||
 |
||
| Picture 3. | ||
 |
||
| Picture 4. | ||
|
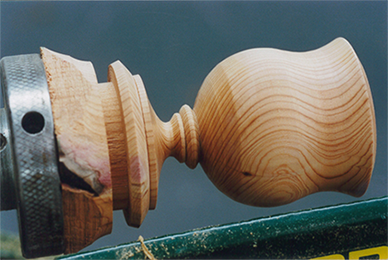
Also it is important to keep the paper moving at all times to avoid any heat build up which can actually cause heat cracks to develop in the end grain, particularly of the fine grain timbers Picture 5. These do not always show up until you apply the first coat and can be quite disfiguring, so don’t press too hard and keep that paper moving to minimise the friction. |
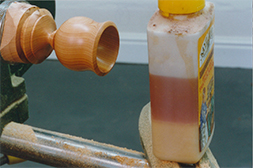
be used on a fast spinning workpiece, and you will never get the penetration and evenness on a moving workpiece. Also do rub it well into the surface, it must penetrate the top layers of the wood and not just sit on the surface. |
 |
| Picture 5. | ||
 |
||
|
Picture 6. |
||
.jpg) |
||
| Picture 7. | ||
 |
||
| Picture 8. | ||
|
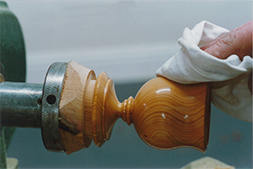
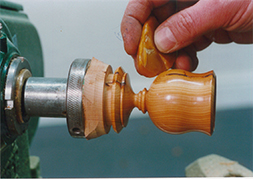
After first thoroughly shaking the friction polish, apply it with a cloth. This shaking is important as the polish has a high solids content which must be thoroughly mixed, Picture 9. On small articles you can put it straight on to the spinning workpiece, but on larger items it is better to stop the lathe and rub on a coat quickly before starting the lathe again to even it out. Put on a fairly generous application to start with, spreading it evenly over the work with the cloth, applying NO pressure at all at this stage. Then gradually apply gentle pressure to dry the film, and watch as the shine develops, Picture 10. Keep re-coating with the lathe spinning, but applying tiny amounts of polish each time to build up lots and lots of thin coats rather than one thick one. If you apply too much on the subsequent coats all that happens is you dissolve off the previous coat and pull it into a sticky ring, so be very sparing. The more coats you apply the better the finish will be, and then burnish the last coat with a very soft cloth. |
The finish is dry straight away, but if you can leave it to harden for several minutes before handling so much the better. |
 |
| Picture 9. | ||
 |
||
|
Picture 10. |
||
 |
||
| Picture 11. | ||
 |
||
| Picture 12. | ||


