


Using the Wood Screw Chuck Successfully
An introduction to the humble yet versatile wood screw chuck.
")
.png) |
|
Turning Tips Using the screwchuck successfully by Alan Holtham |
|
The humble screwchuck has changed dramatically over recent years, and is more often now seen as just one component in a complete chucking system of some sort, Picture 1. I have been turning long enough to remember the days before these multi-chucks were so widely available, times when the screwchuck was possibly the only means of holding the work. Consequently I am something of a fan of this most simple of holding devices, but it does need careful use if you are to get it to work really well. |
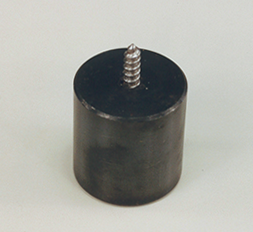
becomes too great and the wood soon tears off. I would not hold a workpiece anything longer than about 5” in end grain on a single screw, Picture 3. Note that the pilot hole for the screw must be the right size, there is a common misconception that if you drill a smaller hole the grip will be tighter. Nothing could actually be further from the truth, a small pilot hole will just cause the screwthread in the wood to strip and the grip will be nil, so drill it the right size! |
 |
| Picture 2. | ||
 |
||
| Picture 3. | ||
.png) |
.png) |
|
| Picture 1. | Picture 4. | |
|
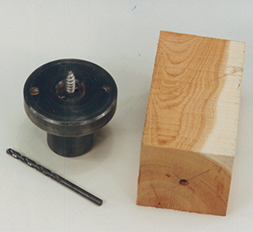
There are several ways of overcoming this; perhaps the simplest is in the choice of your actual chuck. I prefer the type where the woodscrew is set in from the front, Picture 5, as with these you can usually set the screwholder back in below the main face of the chuck. This obviously leaves a shallow recess, which accommodates any burr or other irregularity and provides much more positive seating. This little recess does make all the difference, it has solved all the screwchuck problems of dozens of beginners I have helped, it is the difference between a close fit and a total fit, and there is a difference. |
Now take it off the lathe, drill the pilot hole, remove anything that remains of the ‘pip’ with a chisel, and this will now seat all around the rim of the screwchuck for maximum stability. If you are into really long pieces, or the end grain grip is a bit weak, try drilling a hole through the end of the work at right angles to the screw, Picture 9. |
.png) |
| Picture 7. | ||
.png) |
.png) |
|
| Picture 5. | Picture 8. | |
.png) |
.png) |
|
| Picture 6. | Picture 9. |
|
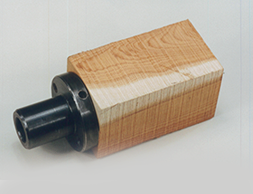
Then hammer in a dowel of some other wood, and mount this on the chuck. You are now gripping into side grain rather than end grain, Picture 10, so the hold is that much stronger; you just part off clear of this as the last operation. This is a good tip not often seen these days, but was standard practice in the past when you wanted to be sure the work was secure. |
I regularly demonstrate eggcup turning on a screwchuck, using blanks 5” long, held on the single centre screw, Picture 12. This involves deep hollowing on the end grain, Picture 13, and then parting off as the last operation, Picture 14, and every demo always attracts at least one person who comes up afterwards and says, “I can never do that on my screwchuck”. Now I hope you can! |
 |
|
Picture 12. |
||
.png) |
.png) |
|
| Picture 10. | Picture 13. | |
.png) |
.png) |
|
| Picture 11. | Picture 14. |


